Following the capture and defeat of the Duke of Rutlands forces at Ashby Folville by the Socialist Council of the City of Leicester, SCCL, the plan was to advance up the road to Carington Coppice to capture the important crossroads there where the SCCL forces could threaten all the Duke's assets and forces in the area. With this is mind the SCCL entrusted 2nd Lt Stan Cunningham, Leics Regt, to advance in a threatening manner to take and hold the vital crossroads and surrounding area.


 |
| The Dukes Armoured Cars Advance up the road firing on the LCCL's Armoured Car |
 |
| The Leicester Yeomanry lay hidden behind Carington Coppice |
 |
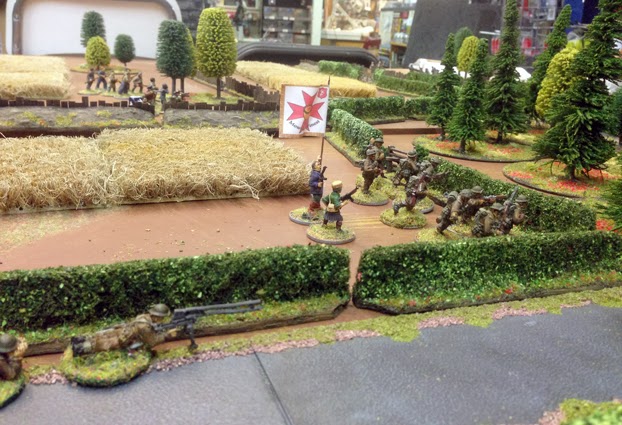
| The Duke's Assault troops come under fire from the Post Office Rocket Battery and they hit with there first round. |
 |
| The Leicestershire's take up defensive positions |
 |
| The Duke's forces advance on the Crossroads with their boys for the Leicestershire leading the way |
 |
| The Duke's Armoured Cars firing on the crossroads and the LCCL's Armoured Car |
As the Dukes forces advanced up the road towards the crossroads they managed to pinned the LCCL's Armoured Car causing to to be taken out of the action at the time and denying the LCCL with valuable support. But the LCCL put up a stiff defence proving fire onto the Duke's Armoured Cars to no effect and finally the Leicester Yeomanry charges the Armoured Cars taking out one of them before retreating back behind the coppice. Meanwhile the Duke's forces advance up towards the coppice and a line of fences coming under firing from the LCCL forces.
 |
| The Leicester Yeomanry attack the Duke's Armoured Cars |
 |
| The LCCL Leics pour fire onto the Walkers Van |
 |
| The Duke's Leicestershire advance to the coppice and they Boys A/T rifle fires at the Armoured Car |
 |
| The Leicester Yeomanry clearing the way |
 |
| The Duke's Assault troops coming under fire from the LCCL's Shoeworkers |
 |
| The Duke's Assault troops after taking heavy fire |
 |
| The Post Office Rocket Battery firing on the Dukes troops as they cross the farm fields |
The Duke's Leicestershires come out into the road to engage the defenders of the crossroads but find themselves in a crossfire from the Croydon Crusher and the LCCL's Leicestershires where fellow soldiers from the same regiment start firing upon each other for the first time, a sad moment in the regiment's history. The Dukes remaining Armoured Car, safe from LCCL fire engage the Leicester Yeomanry who have retreated to behind the coppice for cover and the Croydon Crusher comes under fire from the Duke's forces causing it to be pinned. The LCCL Leicestershires open fire into the Duke's Leicestershire causing them a number of casualties and the LCCL's Armoured Car fires at the Dukes Armoured Car but failed to cause any damage. Meanwhile the Duke's forces in the fields in the centre come under heavy fire for the PO Rocket Battery and a LCCL sniper starts to take its toll on the Dukes troops in the centre.
Now the Leicester Yeomanry charge once again in a "Death or Glory" charge, lances levelled in an attempt to take out the second of the Duke's Armoured cars and succeed in taking it out. With both the LCCLs and Duke's Leicestershires involved in a fierce firefight with each other until the Duke's Leicestershires break and leave the battlefield. With the weight of fire the LCCL pour on the Duke's centre, the Duke's Assault troops also break and leave the battlefield leaving the Duke's battled infantry to weather the LCCL's fire before they too retreat along with the Duke's command leaving the crossroads in the LCCL's hands.
Another good game using Bolt Action rules and with bigger forces, this time 750 pts. Starting to get the hang of the rules now and liking the system. Gosh cavalry is deadly.
 |
| The Duke's Leicestershires attack the crossroads |
 |
| The Dukes Armoured Car fires at the Leicester Yeomanry |
 |
| LCCL Leicesterhires fire at the Duke's Leicestershires, a sad moment in the regiment's history. |
 |
| LCCL's Armoured Car fires upon the Duke's Armoured Cars |
 |
| The Duke's infantry suffering for the effects of Rocket and sniper fire. |
 |
| The Duke's Assault troops pinned down in the field |
 |
| LCCL's Rocket and Sniper teams at work |
 |
| Leicester Yeomanry charge again and take out the second Armoured Car |
 |
| The LCCL's Leicestershires firefight with the Duke's Leicestershires |
 |
| The Duke's Command retreating from the battlefield |
 |
| The Shoeworkers forcing the Duke's Assault troops to break |
 |
| The Duke's Infantry in the centre coming under very heavy fire |
 |
| The LCCL's sniper and Post Office Rifles and Rocket team engaged in the centre |
No comments:
Post a Comment